Icy4Eclipse
This Eclipse plugin provides a nice integration of the ICY image analysis software into the well known Java development platform.
- Start / stop Icy from Eclipse
- Debug your plugins
- Interact with plugins downloaded from the main repository
- New Icy project wizards (you can even add your own templates)
Summary of this page :
- Last news
- Downloads
- Quickstart
- Creating my first plugin
- Working with other plugins
- Migrating an existing project
- For advanced users
- Acknowledgements
- 2014-01-07 | v0.3.6 - new default plugin template
- 2012-12-13 | v0.3.5 - ability to add any JVM arguments
- 2012-02-21 | v0.3.4 - ability to remove any jar file from the Icy run classpath (check configuration informations here or see this page)
- 2011-10-02 | v0.3.3 - ability to start Icy with the Icy-kernel project (see this page)
- 2011-09-08 | v0.3.2 - first stable release
This plugin is open source and provided under the GPL V3 licence. It has been tested on Helios, Indigo and Kepler versions of Eclipse.
The easiest way to obtain the last version of icy4eclipse is to use the eclipse update site (> Help > Install new software) with the following URL :
http://www.herve.name/icy4eclipse/updates/
(you have to enter this URL in Eclipse, in a standard web browser you will get a 403 HTTP error : Forbidden)
If you are new to Eclipse, check this tutorial on how to install the icy4eclipse plugin : http://icy.bioimageanalysis.org/index.php?display=startDevWithIcy#installIcy4eclipse
If you are interested in the source code of this project, have a look at : https://github.com/nrv/Icy4Eclipse
- Download the last version of Icy (available here) and unzip it anywhere on your hard drive.
- Download the last version of Icy4Eclipse (see the downloads section above). You need to restart Eclipse.
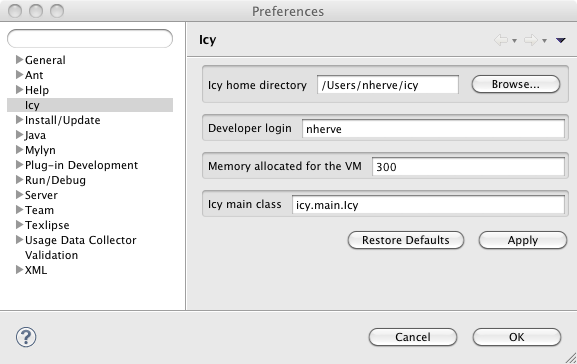
- Edit the general Eclipse preferences. You should now have an Icy entry. Fill the "Icy home directory" field and set it to the directory where you have unziped the Icy software. The "Developer login" field must be filled with you login on the Icy website. If you don't have any yet, choose one. You may also need to increase the memory size allocated to the JVM that will run Icy.
- You can now start Icy either from the menu or the toolbar. You have three different launching configurations. Simply click on the "U" icon for now.

- Icy works the same way as if you had it launched outside Eclipse.
- Check the console output. Icy4eclipse has it's own page here.
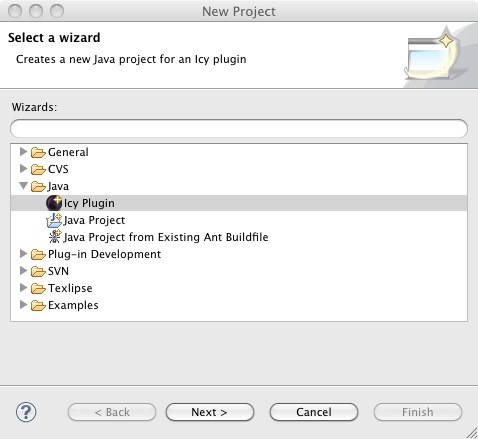
- Creating a new plugin for Icy is really easy. You just have to launch the wizard (File > New > Project ... > Java)
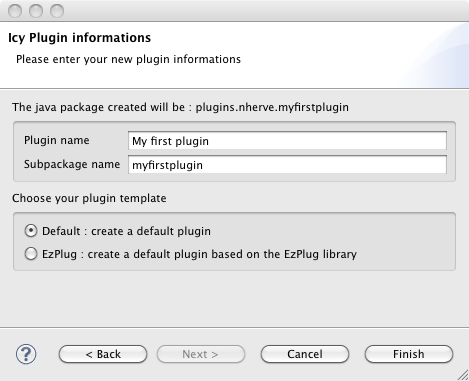
- Just enter your plugin name and click "Finish"
- You project is created. It includes the main class of your plugin.
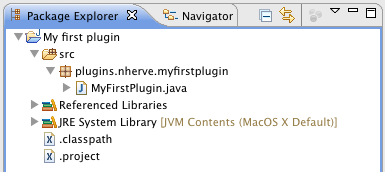
- The buildpath of your project references the icy.jar file through the ICY_HOME environment variable in order to compile correctly. It is a good practice to always use this variable to reference jar files that are in the icy directory.

- You can also see a new item in your project properties screen (quite empty right now).
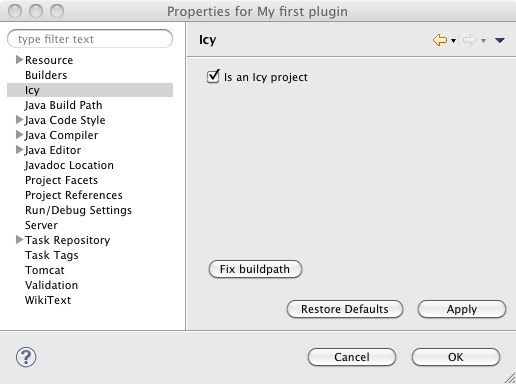
- You can now test your new plugin by launching Icy either in run mode (R icon) or debug mode (D icon).
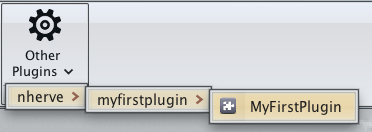
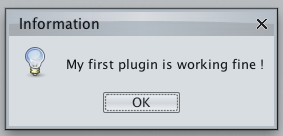
- Now it's time to learn a litle bit more about the nice features in Icy. You may have a look at the documentation or, if you fill confident, take a look at some examples.
The Icy kernel provides a lot of low-level methods to manipulate the images raw data structure as well as the main user interface. All the image processing and analysis methods are provided as plugins.
Sooner or later, you will probably have to interact with plugins developed by others. This small tutorial explains how.
We will use the plugin created in the previous section and make him call the MaskEditor.
First you need to understand the 3 launching modes of Icy from Eclipse :
- R : the run mode. When started this way, Icy is able to see all your opened java projects that are flagged as being also Icy project (see your project preferences page). It is also able to see the downloaded plugins that are in the plugins directory of Icy.
- D : the debug mode. It's the same as the run mode but the breakpoints are activated. You can of course have breakpoints in your Eclipse projects, but also in the referenced libraries. Thus, if you want, you can add breakpoints directly inside the Icy kernel.
- U : the update mode. Due to classloader restrictions, Icy is not able to install new plugins or to update existing ones when started in R or D mode. Use the update mode sometime to enable the update functionnality. In these mode, your Eclipse projects are not visible from within Icy.
Let's start the tutorial :
- We need the MaskEditor plugin for this tutorial. If you don't already have it installed, start Icy in update mode, install it and quit Icy.
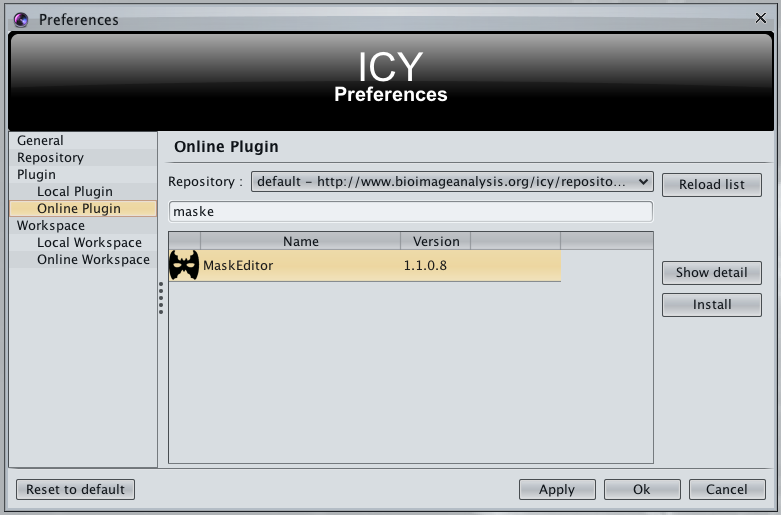
- We need to have the MaskEditor jar file in the build path of our new plugin. Open the project build path properties page and go to the Libraries tab. Then click on Add Variable...
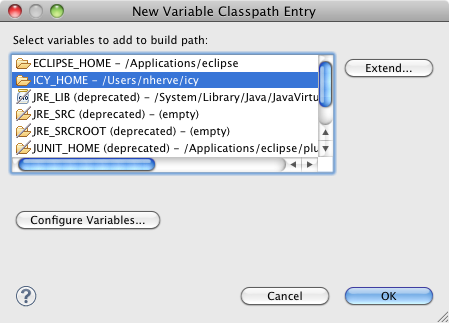
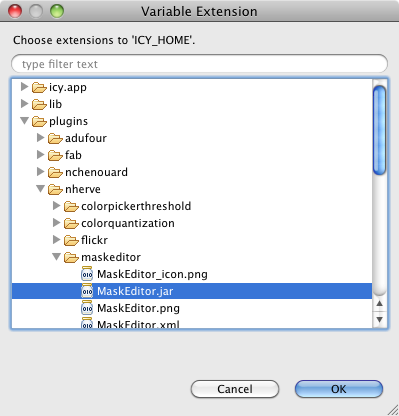
Select the ICY_HOME environment variable and click on Extend.... Browse into the plugins directory and find the correct jar file. Then click on OK.

- Modify the compute() method of your MyFirstPlugin class as follow :
public void compute() {
	new AnnounceFrame("Starting the MaskEditor inside MyFirstPlugin");
	MaskEditor.getRunningInstance(true);
}
- Start Icy in run or debug mode and test your plugin.
- Make sure you have Icy correctly configured (see previous sections)
- Right click on your project and edit the preferences. On the Icy tab, check the "Is an Icy project" box.
- If your project needs other plugins, update the build path in order to use the new ICY_HOME environment variable. If this variable is pointing to your previous Icy instance, you can even go quicker by clicking the Fix buildpath button.
- Make sure you don't have your project already deployed as a jar file in the Icy plugins directory when you want to work on it under Eclipse.
- Use the new launch buttons to start Icy.
- If you need to work with several versions of the Icy kernel, you just have to change the ICY_HOME variable (either in the builpath preference page of a project or on the Icy tab of the general preferences of Eclipse)
- You can provide your own templates for the project creation wizard. Have a look at the icy.icy4eclipse.templates package. In order to provide a new template, you need to create a new class that implements IcyProjectTemplate, register it as a service and deploy it as a new Eclipse plugin.
- Since version 0.3.4, there is a new 'Bypassed jars' field in the configuration page of the plugin. You can enter here a list of regular expressions that will be checked at each Icy start to remove the matching jar filenames from the classpath.
- the separator is the colon :
- the match is case insensitive
- e.g. : if you want to remove any stuff related to EzPlug, enter the following string : ezplug.*
- you can check in the Icy4Eclipse console which jars have been removed from the classpath :
Starting Icy - (debug = false) (disableJCL = true)
 - bypassing jar : ^(.*)ezplug.*$ -> D:\_Nicolas\Travail\icy\eclipse\plugins\adufour\ezplug\EzPlug.jar
 - bypassing jar : ^(.*)ezplug.*$ -> D:\_Nicolas\Travail\icy\eclipse\plugins\adufour\tutorial\EzPlugTutorial.jar
[...]
Many thanks to Bruno Leroux from eclipsetotale.com for releasing the Tomcat plugin project in open source, it was a great inspiration.